

Concrete Block Stand
Overview on The Block Stand Construction
The block outdoor pizza oven stand rests on the foundation and provides the legs that support the insulating hearth. Your oven in turn will rest on the hearth. The stand is constructed using standard concrete blocks and is built to the dimension of the hearth slab.
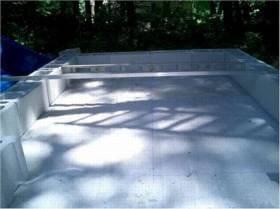
The first three course of the outdoor pizza oven stand from a three-sided U, leaving an opening in the front where you can store wood. The fourth course of blocks spans the opening at the front of the U, by resting on two pieces of 2″x2″x3/8″ angle iron. The Insulating Hearth will be poured and will rest directly on the fourth course of blocks.
For large commercial ovens, it is necessary to build a third leg in the center of the stand (forming a W), to support the Hearth Slab. If you are interested in building a larger oven, please contact us at info@fornobravo.com.
The follow table shows the dimensions of your concrete pizza oven block stand:
| Oven size | Foundation | Block Stand |
| 36″ | 71″ x 80″ | 63″ x 70″ |
| 42″ | 77″ x 86″ | 69″ x 76″ |
Instructions
Build a block stand comprised of four courses using standard 8″x16″x8″ and 8″x8″x8″ concrete blocks found at your local building supply store.
We recommend that you dry stack your building blocks, then fill every other core with concrete and rebar for stability. This approach will save you time and energy compared with mortaring each block in place while providing you with a structurally solid base.
Using a chalk line, lay out your stand, ensuring that it faces exactly where you want your oven opening to face (Photo 1). Then, lay your first course of blocks directly on your concrete foundation slab (Photo 2). Use pre-mixed mortar where necessary to ensure that the first course of blocks is level. Take the time to ensure that the first course is level front and back, side to side and on the diagonals (Photo 3), as it will be increasingly difficult to correct problems later.
In the following courses, stagger your blocks using either 8″x8″X8″ blocks, or cut blocks, to ensure that the joints are offset. Lay the next two courses, for a total of three.
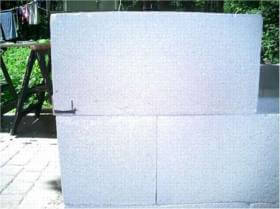
After you have laid your first three courses, set your two pieces of 2″x2″ angle iron across the opening between to two legs of the U-shape. The front piece should span the outer width of the stand while the back piece must be cut to allow clearance for the top course of blocks (Photo 4).
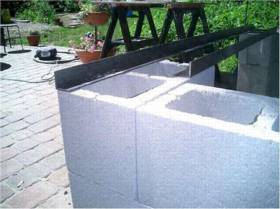
Grind, or cut, 3/8″ from the edges of each block that rests on the angle iron, so that they lie flush with the rest of the fourth course (Photo 5). Finish laying the rest of the fourth course of blocks (Photo 6).
After you have completely assembled the concrete pizza oven block stand, check that the walls are square, level and plumb. Drop a section of 1/2″ rebar in every other core, and fill those cores with concrete.
You are ready for the next step: installing your Insulating Hearth.
Or, go to the Table of Contents for an overview of what is coming up.
Tips and Hints
We recommend using angle iron and a course of blocks across the open span between the stand’s legs for the top course of the stand. It provides security that the hearth will never sag, causing serious problems to your oven, and the added cost and time is low.
We also recommend dry stacking your blocks, then filling every other core with concrete. It’s a lot faster, and sturdier as well.
Much like your foundation, remember that while it is important that your stand is level and square, the blocks will be completely covered with your finish material. Beautiful masonry work on your stand is not essential.
Use a grinder with a diamond blade to remove the 3/8″ from the blocks that sit on the angle iron brace across the span. It will go fast.
To fill your stand cores, mix a wet batch of concrete. Shovel it into a 5-gallon bucket, and pour it into the cores. Construct a cardboard funnel, or attach a paint pourer to the bucket to make it go fast.
To check for level, use a long (2′-3′) level on a 2″x4″ set on its edge. Make sure your support isn’t sagging in the middle.
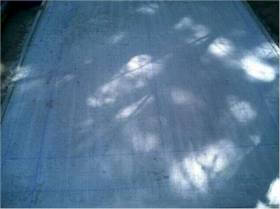
1. Snap lines to outline your stand layout.
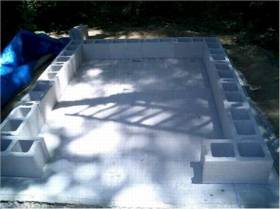
2. Lay the first course, using mortar to level.
3. Make sure the first course is level. It is difficult to catch up later.
4. After three course, lay your angle iron. The back piece allows the block to reach the front of the stand.
5. Notch your blocks to rest evenly on the angle iron.
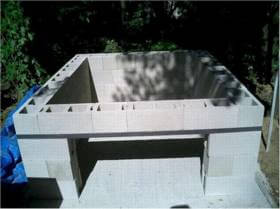
6. The complete stand, ready for the insulating hearth.