

Insulating Hearth
Overview of Your Oven Construction, Insulating Hearth
Your oven sits on a two-layer insulating hearth, which serves three purposes:
— It spans the opening of the block stand;
— It provides the level platform on which your oven floor rests;
— It provides an insulating layer that will stop heat from leaving your oven chamber, and will keep your cooking surface hot and ready to cook.
You have two options for how to build a hearth. It will be a 3 1/2″ structural concrete layer topped with either 4″ vermiculite concrete, or high efficiency, high-tech insulating panels, such as FB Board.
If you are using vermiculite concrete, the hearth is poured in two parts into a form built from 2″x4″ and 2″x8″ lumber and 3/4″ plywood.
Frame the Hearth
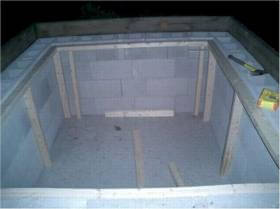
First, build the frame for the bottom of the form using 2’x4’ studs. The frame should be roughly 3/8″ less than the opening of your block stand so that it can be easily removed after the hearth has cured. Then, cut (4) lengths of 2″x4″ that will serve as the legs that hold the bottom frame in place inside the stand opening. Use 1/4″ shims to accurately set the top of the frame. The top of the frame should be about 1″ below the top of the stand (to allow for the 3/4″ plywood and shims). See Photo 1.
Cut the two sheets of plywood lengthwise to fit into the opening (3/8″ less so that it will easily come out later), and lay them on the frame. Tape the joint with masking tape. Set your last two 2″x 4″legs supporting a 2″x4″ on its side directly under the joint, which will support the weight of the wet hearth while it is curing. Shim to level.
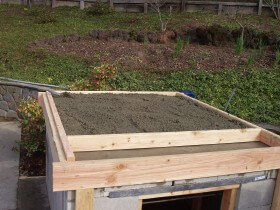
Next, build the sides of the form using 2″x8″ lumber around the outside of the block stand. This forms the sides of your 7 1/2 ” insulating hearth. See Photo 2.
Pour the Hearth
The hearth oven is poured in two parts: a 3 1/2″ layer of structural, rebar reinforce standard concrete, followed by a 4″ layer of insulating concrete. Draw a line 4’ down from the top of the frame to mark the top of the structural concrete layer.
Lay a grid of 1/2″ rebar slightly shorter than the external dimension of the wood forms, on 12″ centers, starting 6″ in from the edges of the form, set half-way up the 3 ½’ concrete layer, about 1 3/4’. Then, pour the 3 ½’ layer of structural concrete. See Photos 3 and 4.
Prepare the insulating concrete using a ratio of 5 parts vermiculite to 1 part Portland cement (5:1). Mix the vermiculite and Portland cement, then add water and mix until you reach an oatmeal consistency. Pour the insulating material to the top of the form. See Photos 5 and 6.
You can pour both layers on the same day, or you can pour the vermiculite layer later.
You are ready for the next step: building your Oven Floor.
Or, go to the Table of Contents for an overview of what is coming up.
Options
There are other options you can consider when designing and building your hearth oven. The Island Hearth and Super Isol.
Island Hearth. If you want to increase the thermal mass under your oven, you can build an Island Hearth, where you build an additional layer of refractory mortar or firebrick below the oven. This layer sits directly under the cooking floor and is surrounded by vermiculite insulation — below and on the sides. This design is not recommended for basic backyard cooking, is useful for bread bakers who want their oven to be fired longer and hold heat longer for multiple batches of bread baking from a single firing. See Photo 7.
Super Isol. You can replace the 4″ layer of vermiculite insulating concrete with a high-tech insulating block called Super Isol. 2″ of Super Isol is more efficient than 4″ of vermiculite concrete and is easier and faster to install.Read more about Super Isol.
Tips and Hints
Cut your frame and plywood for the bottom of the hearth form about 3/8″ shorter than the actual opening. The concrete will not escape when you pour, and it will be easier to remove the form when your hearth oven has cured.
Use shims to set the bottom form level with the top of the block stand. It will be easier to make the form level with the top of the stand, and it is easier to remove it when the hearth has cured.
To stop the top form from bulging out under the weight of the concrete, use either (2) 2″x4″‘s nailed in place on the top of the form in one direction, and nailed in place and angled to the ground in the other direction. Or, use ratcheting cargo straps tightened around the outside of the top form.
We recommend mixing your vermiculite concrete by hand, rather than in a mixer — which tends to break the vermiculite up and reduce its efficiency. It is a light mixture that is easy to work with. Mix the vermiculite and Portland cement, so that the cement covers the vermiculite, then add water until you reach an oatmeal-like consistency.
The rebar should be roughly in the middle of the concrete layer (1 3/4″ from top and bottom), but it isn’t rocket science and don’t worry if it is a little off-center.
1: Legs and frame, ready for the plywood bottom.
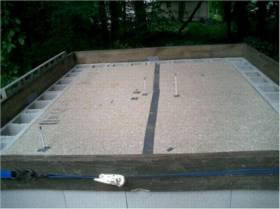
2: Lay the plywood on the 2″x4″ frame, tape and support from below.
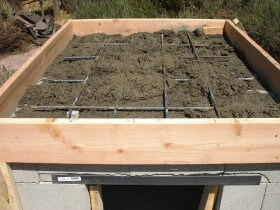
3: The poured structural concrete with rebar.
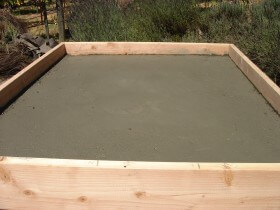
4: Structural concrete layer.
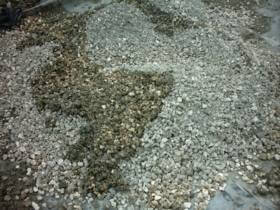
5: Mixing vermiculite.
6: Poured vermiculite (note that the builder formed the hearth so that there is no vermiculite under than oven landing at the front of the oven.
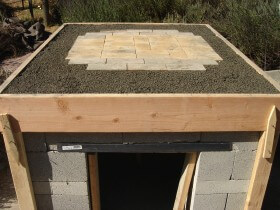
7: Island Hearth, with layer of firebrick under the cooking floor.