

Herb Roasted Chicken
Jan 04, 2016Print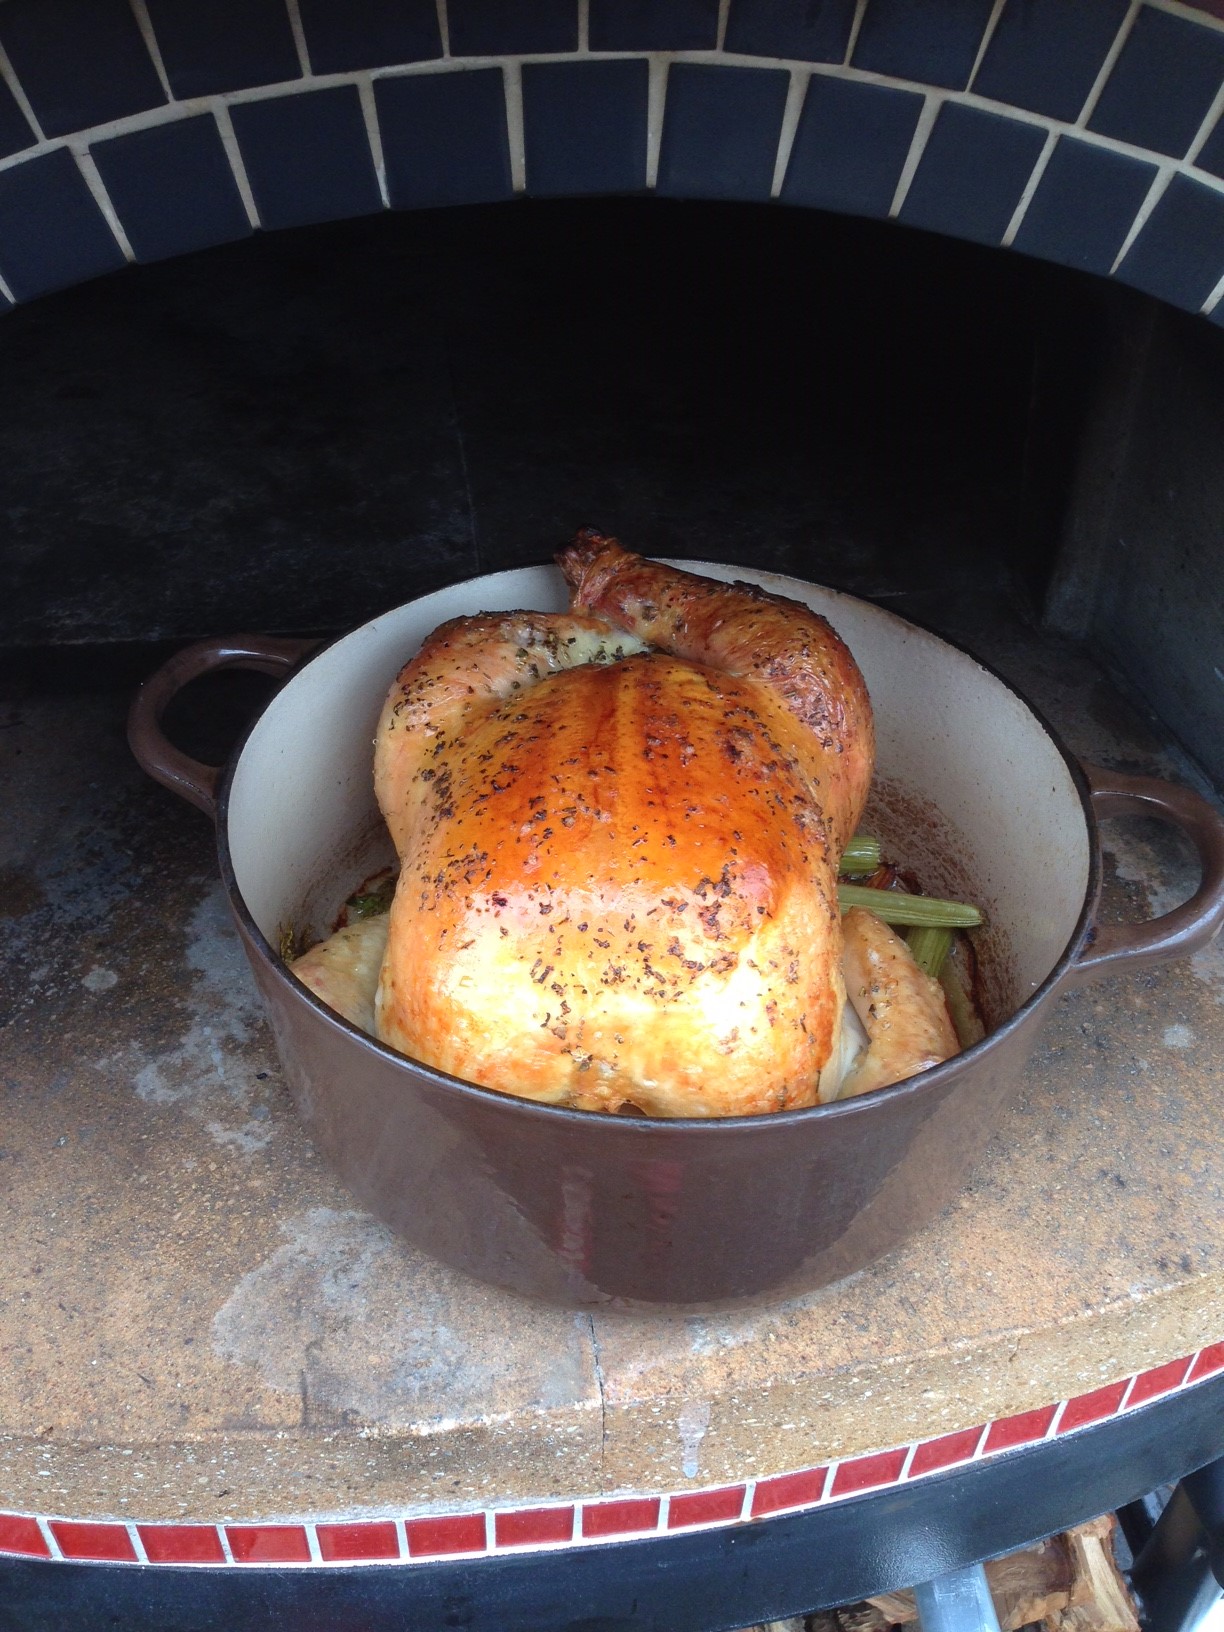
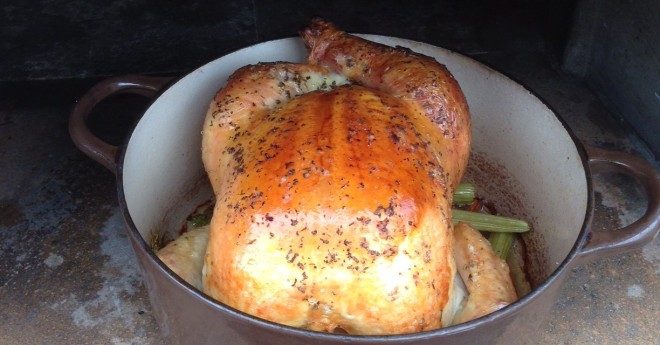
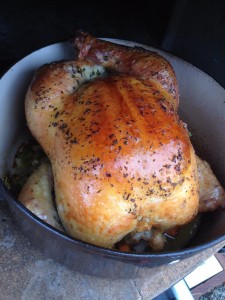
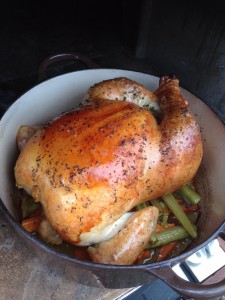
I have always found comfort in roasted chicken, both the process of making a roasted chicken and eating one. It always reminds me of a Sunday supper with the entire family around the table. If your family is anything like mine (7 of us,) you might need two birds. The cooking time will largely depend on the temperature of your wood burning oven — a 3 pound bird will take somewhere between 45 minutes to an hour. I like to have my Forno Bravo Vesuvio oven right around 400°F and I prefer to use a large Dutch oven for my roasting vessel. This gives me the ability to put a lid on it if the bird is getting darker faster than I would like.
The chicken is great served with mashed potatoes. A little trick I employ is to line the bottom of the roasting pan with some sliced onions, celery and carrots, which will give you some fabulous drippings to pour over your finished chicken, and with a little sea salt, serve as a delicious vegetable side dish as well.
Be Great, and may your table always be full!
Chef Todd
Herb Roasted Chicken
Ingredients
- 1 Whole chicken Free Range
- 2 Each yellow onions Peeled & sliced 1/2 inch thick
- 4 Sprigs Rosemary & Thyme
- 1 Each lemon Cut in 1/2
- 6 Cloves garlic Smashed
- 2 Branches celery Cut into 1 inch long pieces
- 2 Each carrots Peeled and sliced into 1/2 inch coins
- 2 tsp. Kosher Salt
- 1 tsp. cracked black pepper corns
- 2 Tbsp. olive oil Extra virgin
Instructions
- Always rinse your bird with cold water, especially the center cavity. I like to sit the bird on top of paper towels to drain after rinsing it while I do all my knife work.
- Once you have sliced your onions, cut your celery, and sliced the carrots, you can season the inside of your bird with a pinch each of kosher salt and pepper. Fill the cavity with 2 slices of yellow onion, 2 sprigs each of Rosemary and thyme, as well as the lemon halves and the garlic cloves.
- At this point, I like to truss the legs together with butchers twine or simply make a small incision in the fatty skin between the thigh and the end of the breast. Once you have made the incision, cross the legs of the bird, and stretch the skin over the opposite leg and slip the knuckle through the incision. This will hold the bird together during roasting.
- Place the remaining onion slices, celery, and carrots in the roasting pan, and set the bird on top of them.
- Take the remaining rosemary and thyme and chop it. Add it to the olive oil and mix. Drizzle the oil mixture over the bird, and gently massage it all around the bird. Sprinkle with the salt and pepper, and the bird is ready to go into the wood burning oven. Place the roasting pan in the center of your wood burning oven with the breast meat facing the embers and close the door.
- You'll want to rotate the pan 15-20 minutes through the cooking processes, at which time you may choose to add the lid to your Dutch oven. Using a stem thermometer, check the temperature of your bird by sticking the thermometer into the thickest part of the breast and the thickest part of the thigh where it connects to the carcass. You want an internal temperature of 165º F. Pay attention to the liquid that comes out of the bird when the thermometer is removed. It should be clear. If it is pink, your bird needs a few more minutes.
- Once the bird has reached the desired temperature, remove it from the oven and allow to rest on a warm surface for 5 minutes. Remove the bird from the pan and set it on a clean cutting board. Season the roasted vegetables with sea salt and place them on a serving platter. Cut the chicken into the desired number of pieces, and arrange them on top of the roasted vegetables. Drizzle with any remaining drippings and serve it up!
Notes
Brick Oven Cooking Techniques: Roasting
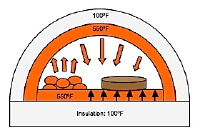 Roasting temperatures (between 600ºF – 400ºF) are perfect for searing meats, and browning vegetables or casseroles before covering them with a lid or with a liquid. These temperatures also work well for cooking food thoroughly, but not letting the outside burn or over-brown. This temperature range is lower than for fire-in-the-oven cooking (pizza), but higher than for traditional baking. Note: 500ºF and below is good for roasting chicken. If your temperature is above 400ºF, you will likely need to cover it with foil or a lid at some point while cooking to prevent burning.
In order to roast, first, bring your oven up to pizza temperatures (700ºF), then allow the temperature to drop, and the fire to burn down, but not out. Push the coals to one side. The fully-fired oven, combined with a low fire, enables you to sear and brown dishes, and then continue cooking for a longer period of time, as the oven temperature slowly drops.
Your oven should have no visible black on the dome, a medium-sized bed of coals, and a small, 2-4″ high flame. The door may be left off for short roasting times (under one hour,) or positioned inside the arch opening to help regulate heat for longer roasting periods. Add small pieces of wood, as needed, to maintain your desired temperature.
More on Retained Heat Cooking >>
Roasting temperatures (between 600ºF – 400ºF) are perfect for searing meats, and browning vegetables or casseroles before covering them with a lid or with a liquid. These temperatures also work well for cooking food thoroughly, but not letting the outside burn or over-brown. This temperature range is lower than for fire-in-the-oven cooking (pizza), but higher than for traditional baking. Note: 500ºF and below is good for roasting chicken. If your temperature is above 400ºF, you will likely need to cover it with foil or a lid at some point while cooking to prevent burning.
In order to roast, first, bring your oven up to pizza temperatures (700ºF), then allow the temperature to drop, and the fire to burn down, but not out. Push the coals to one side. The fully-fired oven, combined with a low fire, enables you to sear and brown dishes, and then continue cooking for a longer period of time, as the oven temperature slowly drops.
Your oven should have no visible black on the dome, a medium-sized bed of coals, and a small, 2-4″ high flame. The door may be left off for short roasting times (under one hour,) or positioned inside the arch opening to help regulate heat for longer roasting periods. Add small pieces of wood, as needed, to maintain your desired temperature.
More on Retained Heat Cooking >>