

Oven Finish: Indoor
Overview
This page provides general instructions for finishing indoor brick pizza ovens. To complete your indoor brick oven build, you need specific instructions which are beyond the scope of these plans, including setbacks from combustible material, building indoor partition walls, and connecting your chimney. Please make sure that your installation complies with your local building codes. Contact your local building department for me specific information.
Setbacks and Combustibles
Whether you are using a concrete block base, or the Forno Bravo heath and stand, your brick oven pizza must be set back at least 4″ from any combustible material. To do this, install a layer of concrete board behind your oven, from the top of the stand to a height of 6 inches above the top of the oven dome. Then, set the oven dome on the heath slab such that it is more than 4″ away from that concrete board. After you have built your metal stud and concrete board partition wall, that airgap will be filled with noncombustible loose vermiculite insulation.
Chimney
Most inside installation requires a UL103 certified steel double wall chimney system, such as Simpson DuraTech. Contact your local HVAC company for details, and check your local building department for local building codes.
The Partition Wall
Regardless of whether your indoor brick oven build is in a corner or on a wall, it can be enclosed with a metal stud and concrete board partition wall and finished with your choice of material.
Using traditional partition wall building techniques, build walls using a single metal stud lying flat as a bottom plate resting on the oven hearth slab, and two metal studs lying flat as the top plates attached to our ceiling. Take care to locate the wood studs in your ceiling to attach the top plates. Attach the bottom plate to the concrete hearth slab using concrete screws. Set metal studs every 16″ in the body of the wall to support the concrete board.
Interlock the top two metal studs top plates at each corner to give the structure more strength. Set two vertical studs at each corner for a larger face to attach the concrete board, and to give the structure more strength.
The Pizza Oven Opening
Set the location of the front wall of the oven enclosure so that the brick arch at the oven opening projects forward by a couple of inches. Set one horizontal stud at the top of the arch, and set two additional studs at a 45 degree on the side of the arch to provide support for the concrete board.
Finish
Attach your concrete board using screws designed for metal studs. You can finish your indoor brick pizza ovens with stucco, brick or stone.
You are now ready to cure your oven.
Back to the Table of Contents.
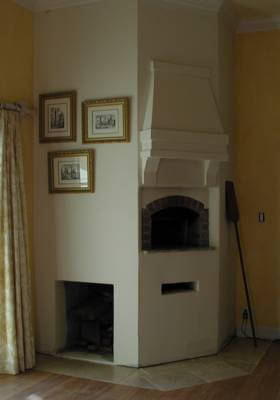
1. Indoor corner design.