

Installing Your Forno Bravo Countertop Pizza Oven
Installation of a pizza oven can be unique to each location and oven style. Some combinations of lighter ovens, easy access, and flat ingress are easier to install — requiring no equipment or simply an engine hoist or pallet jack. Homes or restaurants with larger ovens, restricted access, or sloped ingress will require a larger forklift to move the oven, or sometimes a crane to lift the oven over the house, hedge, or fence and into place. The sequence below is mostly intended for our heavier countertop ovens (Toscana, Vesuvio, and Napolino) but can be used with any Forno Bravo countertop oven.
NOTE: The following suggestions are general in nature. Please use good judgment and common sense when evaluating whether they apply to your particular situation before using them. If you need assistance deciding the best way to install your oven, please contact a qualified contractor or contact Forno Bravo Tech Support for help.
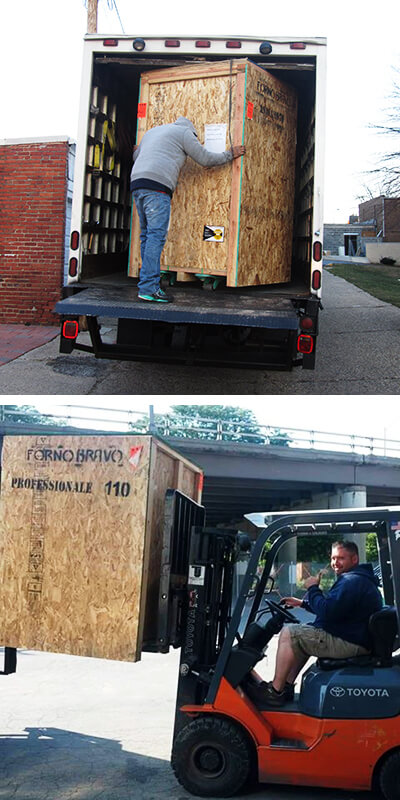
Receiving Your Oven Crate
Ovens come LTL shipping directly to the customer. The mode of transport depends on the size and weight of the oven. See this chart for full details.
- All residential oven kits, the Professionale oven kit, and the Napolino, Primavera, Andiamo, and Bella ovens all arrive on a truck with a lift gate for offloading the crate curbside.
- Modena oven kits, Toscana, Vesuvio, and all fully-assembled commercial ovens require a forklift to remove the oven from the truck. (See this chart for fork size required.)
- Napoli ovens will arrive on a flatbed truck instead of LTL shipping, due to their weight.
Receiving your Oven Crate with a Liftgate or Fork Truck
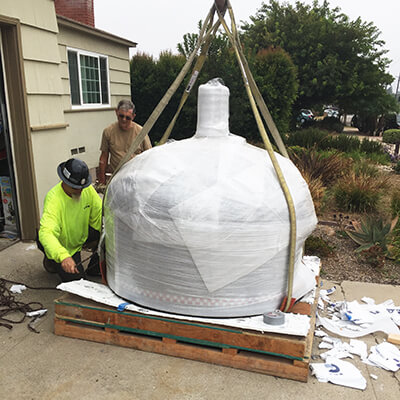
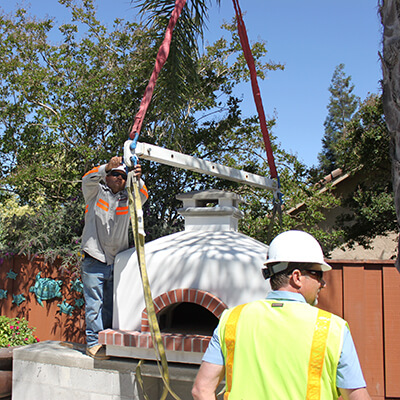
Installing Your Oven Using a Crane, Forklift, or Engine Hoist:
Note: Once the crate is removed from the truck, our two-tiered pallet design allows straps or forks to be inserted under the oven. An engine hoist, forklift, crane, or similar equipment is required to install the oven onto the counter or stand.
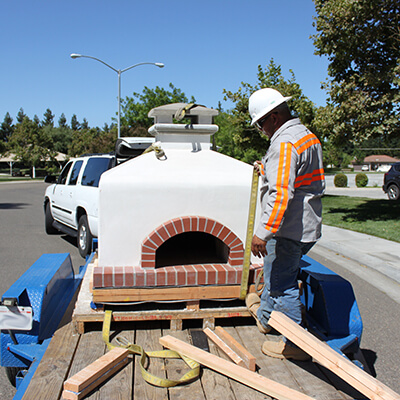
Example of a Napolino Pizza Oven on a Two-Tiered Pallet with a Foam Layer
Step 1: Remove Foam
Break away the foam under the oven to create two channels for the straps or forklift.
Removing Foam to Create Channels for Straps or Forks
Step 1a: This Note Applies to Toscana Ovens Only
Using a long 2 x 4 under the oven, pop out the 2 x 4’s on the back of the upper pallet.
(The extra boards support the oven’s square enclosure during transit. For easy removal, the boards are not nailed in place.)
Removing Rear Support Boards from a Toscana Pizza Oven
Step 2: Insert Straps or Forks
Feed the straps (or forks) through the channels under the oven.
Feeding Straps Under the Oven
Step 3: Use a Spreader Bar if Using the Straps
Use a “spreader bar” to expand the choke and take the strap angle outside the edge of the oven. Position the straps on the very corners of the oven. This reduces pressure on the oven’s stucco or tile finish as it is being lifted. Orient the bar back to front (extending past the oven’s rear and hearth sides) and lift the oven off the pallet.
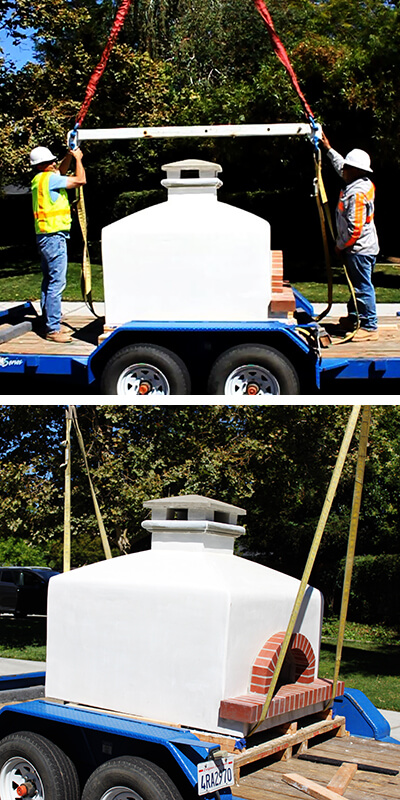
Use a Spreader Bar and Place the Straps on the Outside Corners to Protect the Oven
Step 3a: Tip for Protecting the Oven
To protect the oven during transit, you can leave the foam wrap on the outside of the oven while moving it, or use fabric, like furniture or cargo blankets, on any pinch points. Do handle the edges of the oven carefully to avoid damaging them.
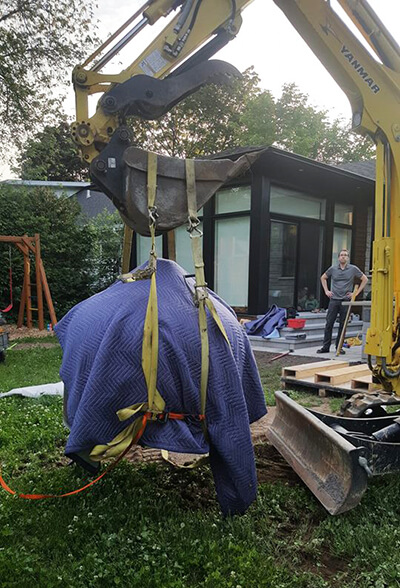
Napolino Pizza Oven Protected by Furniture Blankets
Step 4: Remove Padding
Remove any remaining foam or wrapping from the underside of the oven.
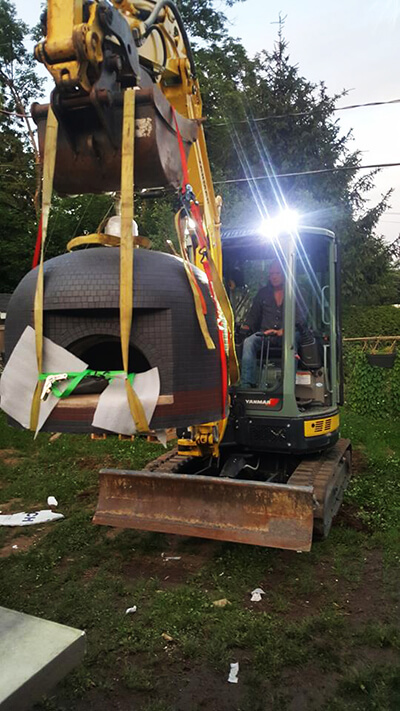
Napolino with the Padding Removed, Except at Pinch Points
Step 5: Ice and Oven Placement
Place 4 – 10lb bags of ice* on the counter (perpendicular to the front edge and towards the center of the oven so that the straps (or forks) will clear.)
Measure clearances to be sure the oven is square to the pad.
Line the oven up to the front edge of the counter, but be sure to off-set the oven, if necessary, to account for any finishing work/facing you are going to do to the oven or the base.
See the photo for a real-life example, as well as a diagram of the general ice bag placement.
* The ice bag installation technique is provided compliments of our friends at Outdoor Pizza Ovens of Canada. We appreciate their tip!
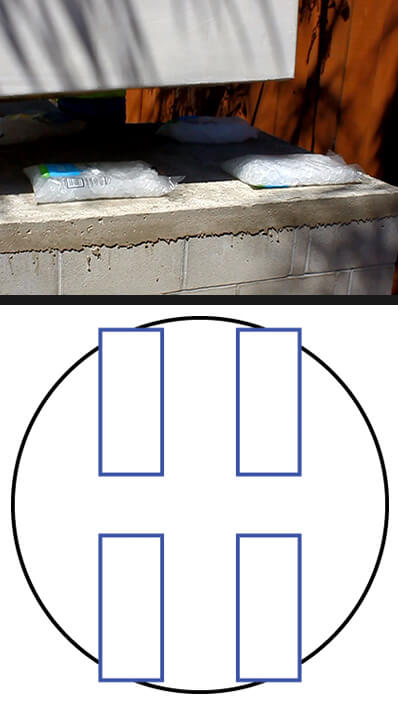
Sample Ice Bag Placement during Oven Installation
Step 6: Finishing the Installation
Lower the oven onto the ice. Drop the spreader bar a few inches to relieve the tension on the straps. Unhook them from the bar and remove. You can do micro-adjustments until the oven is straight and the ice melts completely. Carefully trim off any visible plastic from the ice bags using a box cutter or knife after the oven has settled.
Alternately, you can remove the ice from the bags and put it in 4 piles on the counter prior to depositing the oven on top of them.
After Oven is on the Ice, Lower the Spreader Bar Slightly to Remove the Straps
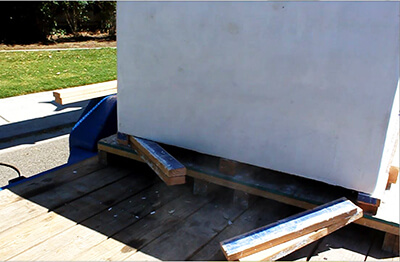
Using Wedges Instead of Bags of Ice:
If you do not want to use ice bags, you can place the oven onto wooden wedges. After setting the oven down onto the counter/wedges, unhook the straps from the spreader bar and release them.
Next, use a crowbar(s) and a few helpers to gently lift one side of the oven, and extract the strap and the wedges. Repeat on the other side.
Notes:
- Be sure you have the oven placed exactly where you want it. It will be very difficult to move it or do micro-adjustments after the wedges are removed.
- This method works best if your oven comes in a metal tray, but it is not mandatory.
- Be extremely careful not to chip or damage the oven’s tile or stucco edge when lifting it.
An Alternate Installation Technique — Moving the Oven and Pallet Together
This alternative installation method is intended for use with lighter ovens, like the Napolino, and locations that have flat, easy access to the oven’s counter.
Before beginning, please confirm that the equipment you are using is rated for the weight and size of the oven you are installing. (See this chart for details.)
Overview: You will be using a Bobcat or fork truck in lieu of a crane or engine hoist, and will include the pallet when moving the oven into place before inserting the bags of ice. (Note: For smaller ovens, the installation method described below may be quicker and easier to use than rigging straps.)
Step 1: Remove the Styrofoam (and rear boards on the Toscana) from under the oven while uncrating. (See above.)
Step 2: Slide the forks through the lower pallet. Place several layers of the packing foam or cargo blankets between the oven and the metal backstop of the forks to protect the oven in case of movement. Drive the oven to the installation location and place the oven and pallet on the prepared countertop.
Step 3: Slide the forks directly under the oven. Put a double layer of packing wrap foam under each corner where the forks will touch the oven before gently raising the forks to lift the oven off of the pallet by a few inches. Remove the pallet from the counter.
Step 4: With the oven elevated, slide 4 – 10lb bags of ice onto the counter under the oven.*
- *We recommend the bags be perpendicular to the front edge and towards the center of the oven so that the forks will clear. However, the ice placement is less critical in this variation than when using straps, since you can see exactly where the forks are that will need to be extracted.
- Do measure clearances to be sure the oven is square to the pad. Line it up to the front edge, but be sure to account for any additional finishing work/facing you are going to do to the oven or the base.
Step 5: Lower the oven onto the ice and extract the forks. You can adjust the oven’s orientation until the oven is straight and the ice melts completely. Carefully trim off any visible plastic from the ice bags using a box cutter or knife after the oven has settled.
Napolino Installation in Progress using the Ice Bag Trick