

Oven and Vent Assembly
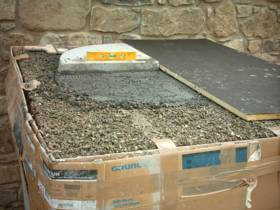
1. Cooking floor level on refractory mortar
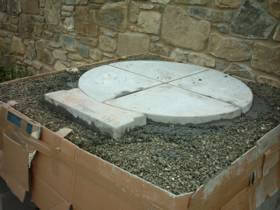
2. Cooking floor set on hearth
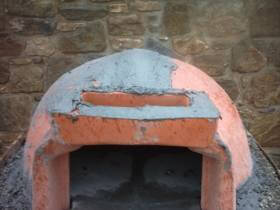
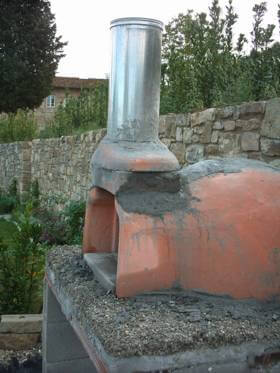
3. Sealing the chimney interface on the vent
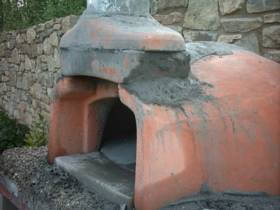
4. The sealed vent
Oven Assembly
One of the strong advantages of using a modular oven is its ability to deliver outstanding oven performance in a package that can be easily shipped to the installation site and quickly installed.
After building the oven hearth and stand, we were able to install the oven and vent floor, the oven dome, the two-piece vent and the steel chimney, and then seal the entire oven in less than 1 1/2 hours. The oven floor and vent pieces can easily be set in place by a single builder. The oven dome of the Casa90 comes in two pieces and was heavier. I was able to move it the building site by myself, but required help setting the dome in place. Still, I only needed help for about 10 minutes to assemble the dome around the oven and vent floor.
The oven owner has the choice of either sealing only the oven and vent joints or coating the entire oven with a layer of refractory mortar. In the spirit of going fast, we chose to only seal the joints. I have used a number of ovens where this was the installation method and find the performance to be very good.
The additional layer of refractory mortar holds additional heat, and can be useful for baking and roasting and for longer cooking, lower heat dishes, including soups and beans. It is important to note that both installation methods are authentic, and both work well.
Using refractory mortar and a notched trowel, we set and leveled the oven floor. For anyone who has set ceramic tiles, the task of setting the floor will be very intuitive and familiar. We then assembled the oven dome.
Next, we assembled the oven vent. The vent comes in two pieces so that it can easily accommodate either a concrete/clay chimney or a steel chimney. Our installation used a steel chimney, so we used both the rectangular vent and the round chimney adapter. Using refractory mortar between the oven and the vent pieces, much the way one would lay bricks, we assembled and sealed the vent. We set the round chimney inside the adapter and sealed that piece with refractory mortar. We used additional refractory mortar to seal then entire vent assembly and to ensure that there were no cracks and that smoke could not escape.
It is important to note that we set the vent so that the front of the vent assembly and the front sides of the oven lined up. The notch on the oven vent sits on top of the oven, in order to make the vent assembly lie level. You will attach your decorative arch to the sides of the oven and the front of the vent assembly.
Finally, we sealed the joint where the bottom of the oven met the insulating hearth.
We are ready to move on to Insulating your Oven.