

Oven Vent
Overview
Unlike a fireplace, where the chimney is inside the firebox in the back, the Pompeii pizza oven vent and chimney are outside of the brick oven pizza — in the front. There are a number of different widely used methods for constructing the vent system for your Pompeii Oven, including:
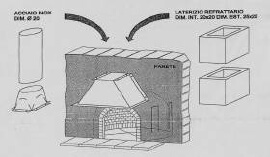
A Steel Vent
Have a steel vent fabricated locally, which can be attached to the housing which encloses the oven chamber, then connect the vent to a steel double wall chimney system, such as Simpson DuraTech. The steel vent can either be fully enclosed, using either brick or metal stud and concrete board walls, or it can be left open, giving you an unobstructed oven landing area. The fully enclosed vent landing can be finished with its own decorative arch made with brick or stone.
The vent itself can be hidden behind decorative material, or if you like the metal vent look, you can have an attractive vent fabricated and left on display. We have posted a drawing of a typical metal vent, along with drawings for open and enclosed vents in graphics 1-4.
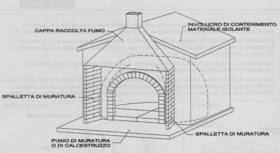
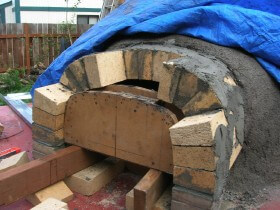
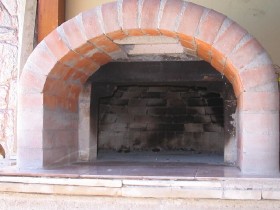
A Brick Vent
Use brick to construct vent walls and an arch which contains the vent opening. Build your vent walls, then using a wood or foam form, build the arch, cutting the center bricks to leave a vent opening.
Depending on the type of chimney system you are using, you can either leave a roughly 6″x10″ opening for use with a rectangular clay chimney flue liner, or a 9 1/2″ opening for an 8″ Simpson DuraTech Anchor Plate.
Using either one or two courses of decorative bricks, construct the walls of the oven air vent area. Then, using a wood or foam arch form, start the process of building the vent arch. When you reach the center of the arch, cut back those bricks to leave the opening. This technique is shown in graphics 5-7.
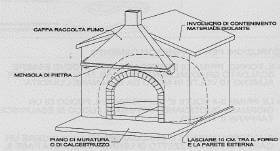
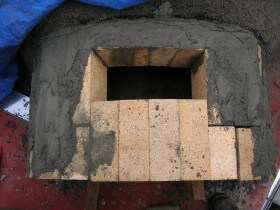
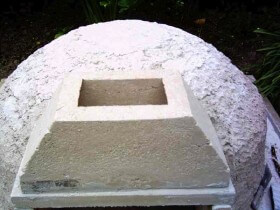
Cast a Concrete Vent
Construct a wooden form to the shape of the vent that comes with the Forno Bravo Casa ovens, leaving a 9 1/2″ hole to attach the DuraTech Anchor Plate. Add chicken wire to give the vent structural integrity. Pour the vent and allow 2-3 days for the concrete to dry before you remove the form. The
Then, build vent walls using standard bricks that will support the vent. Set the vent walls back 1/2″ from the oven opening to leave room for the oven door to meet flush with the opening. Connect the DuraTech Anchor Plate to the vent or mortar a clay flue liner to the vent. You can finish the entire vent assembly with a decorative, non-structural, brick arch. Graphics 8-11 show this technique.
You are ready for the next step: building your Vent Arch.
Or, go to the Table of Contents for an overview of what is coming up.
Tips and Hint
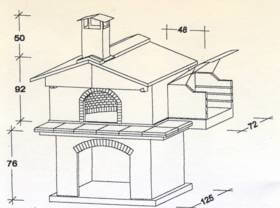
There are two ways of going about the Pompeii pizza oven vent and vent landing. You can either attach the vent to the oven enclosure wall, and leave the landing complete open, or you can build brick sides to the landing, and rest the vent on the vent landing walls. There are pluses and minuses to both. The open plan gives you more landing space, might be a little harder to install and might not draw as well. The closed plan gives you a more constricted landing, but is easier to build, and draws well.
1. The steel vent and chimney system.
2. Gabled enclosure without vent walls.
3. Walled-in vent.
4. Open vent.
5. Vent arch with wooden form.
6. The vent opening.
7. Front view.
8. Vent mold.
9. The vent ready to go.
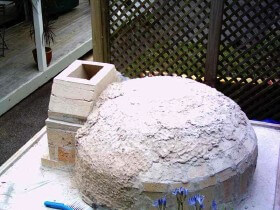
10. The vent with brick wall support.
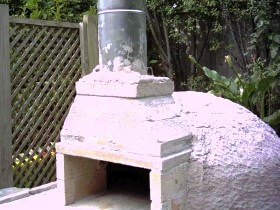
11. Vent with chimney attached.