


 Tweet
Tweet
I've been reading this forum for a while now to get some ideas and inspiration, and I've finally got round to starting my oven. I still haven't decided how I'll build the dome, but am cracking on anyhow.
Here's the slab poured, ready to start building:
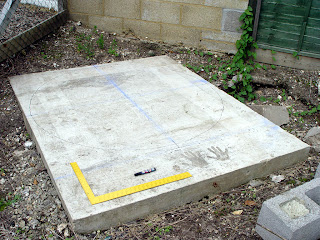
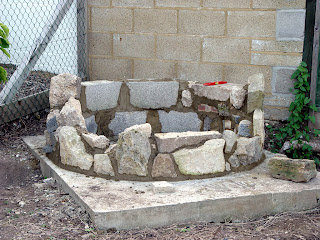
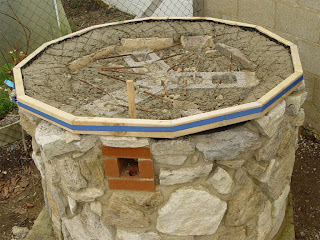
I'll be building the walls from scrap concrete from a demolished garden wall, apart from the front where I'll be using some free rockery stones that I've scavenged off freecycle. I don't have a lot of cash to spend on my oven, and I'm trying to use recycled materials as much as possible. Good for the environment, and my wallet! The circular walls are about 60" in diameter - I only want a fairly small oven, so I hope this is enough space.
My family think I'm nuts ("why not just have a BBQ?"), but that only spurs me on...
Since I'm on a budget, this project's called 'Forno Economico'... I'm also keeping track of it all here too: Forno Economico
Thanks everyone for your contributions to this forum - you're a continual source of information and inspiration.
Here's the slab poured, ready to start building:
I'll be building the walls from scrap concrete from a demolished garden wall, apart from the front where I'll be using some free rockery stones that I've scavenged off freecycle. I don't have a lot of cash to spend on my oven, and I'm trying to use recycled materials as much as possible. Good for the environment, and my wallet! The circular walls are about 60" in diameter - I only want a fairly small oven, so I hope this is enough space.
My family think I'm nuts ("why not just have a BBQ?"), but that only spurs me on...
Since I'm on a budget, this project's called 'Forno Economico'...
I'm also keeping track of it all here too: Forno EconomicoThanks everyone for your contributions to this forum - you're a continual source of information and inspiration.

 - we'll have to find somewhere else to add them.
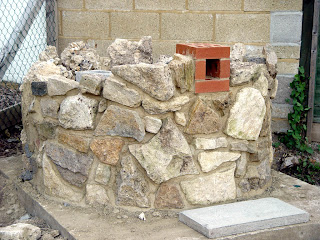
 !
!
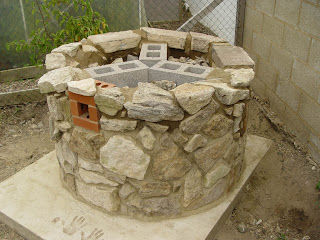
 I still am not sure how I will finish off the top dome and integrate with the stone. Maybe flat top?

Comment